
What are we actually renewing?
Renewing an FNMT certificate lets you obtain a new Certificado de Ciudadano without another in-person office visit, but only if you meet FNMT’s conditions. Under the current rules, renewal can be started during the 60 days before expiry, the existing certificate must not have been revoked, and the online renewal route can only be used once. In the documented case this was the first renewal and the original identity verification had been completed in person.
This guide follows a real session on an Intel Mac using Chrome and Firefox, Configurador FNMT-RCM 5.1.2 and AutoFirma. It also includes the things that did not work cleanly: no Export option in the certificate context menu, an OpenSSL RC2 error, macOS Gatekeeper, a Firefox timeout, FNMT requiring the terms to be genuinely opened, and two identical entries for the new certificate in Keychain.
Information checked: 26 August 2026. FNMT is currently migrating from RSA to ECC. Check the official FNMT requirements before starting your own renewal.
Before you start: make sure renewal is available to you
- the old FNMT certificate must still be valid and within the 60-day renewal window;
- it must not have been revoked;
- this should be the first online renewal of that certificate;
- for this route, no more than five years may have passed since the holder’s in-person identity verification;
- the request and download must be completed on the same computer and under the same OS user account;
- do not format or substantially rebuild the system between the request and the certificate download.
If the current certificate was obtained by identifying yourself with another digital certificate, DNIe, video identification, or if it has already been renewed once, FNMT directs you to the new-certificate process with identity verification again.
Step 1: back up and verify the old certificate
Before touching the renewal process, I first checked that the existing certificate had its corresponding private key. On macOS this is easy to verify in Keychain Access → My Certificates. In this case the certificate was stored in the System keychain.
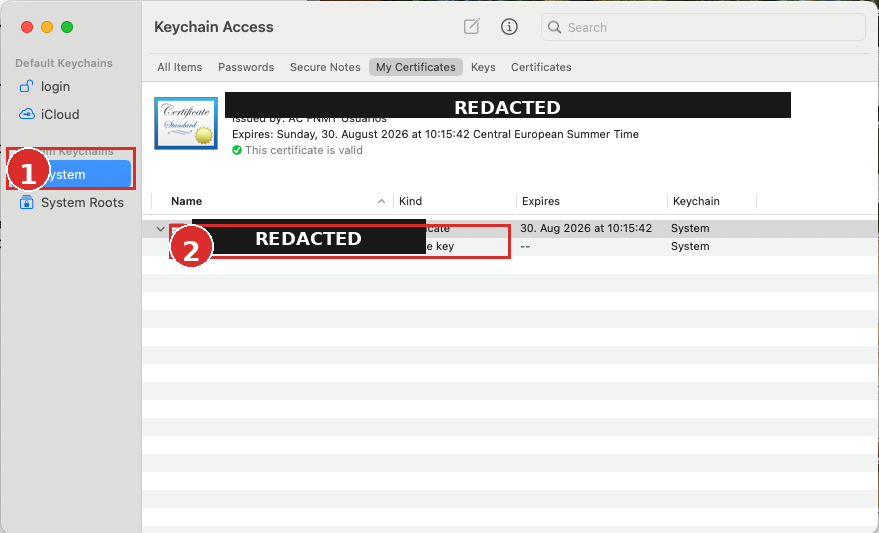
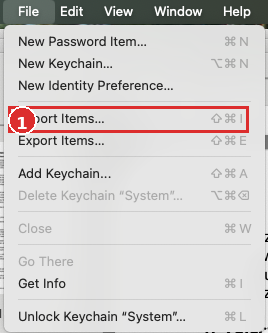
The certificate’s context menu did not offer an export action. File → Export Items… did. I exported it as a PKCS#12 .p12 file and protected it with a separate strong password.
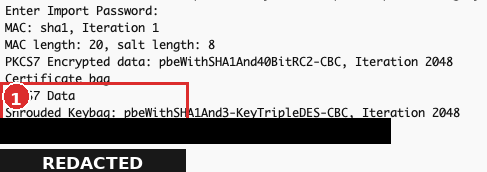
A file existing on disk is not enough; I also wanted to confirm that it contained both the certificate and the private key:
openssl pkcs12 -in backup-fnmt.p12 -info -nooutOpenSSL 3 failed on the older file with an RC2-40-CBC unsupported error. The official OpenSSL documentation recommends the -legacy mode for older PKCS#12 files that use such algorithms:
openssl pkcs12 -legacy -in backup-fnmt.p12 -info -nooutThe successful output contained Certificate bag and Shrouded Keybag. That was the practical checkpoint I wanted: the backup held a certificate and an encrypted private key.
Step 2: install Configurador FNMT and AutoFirma
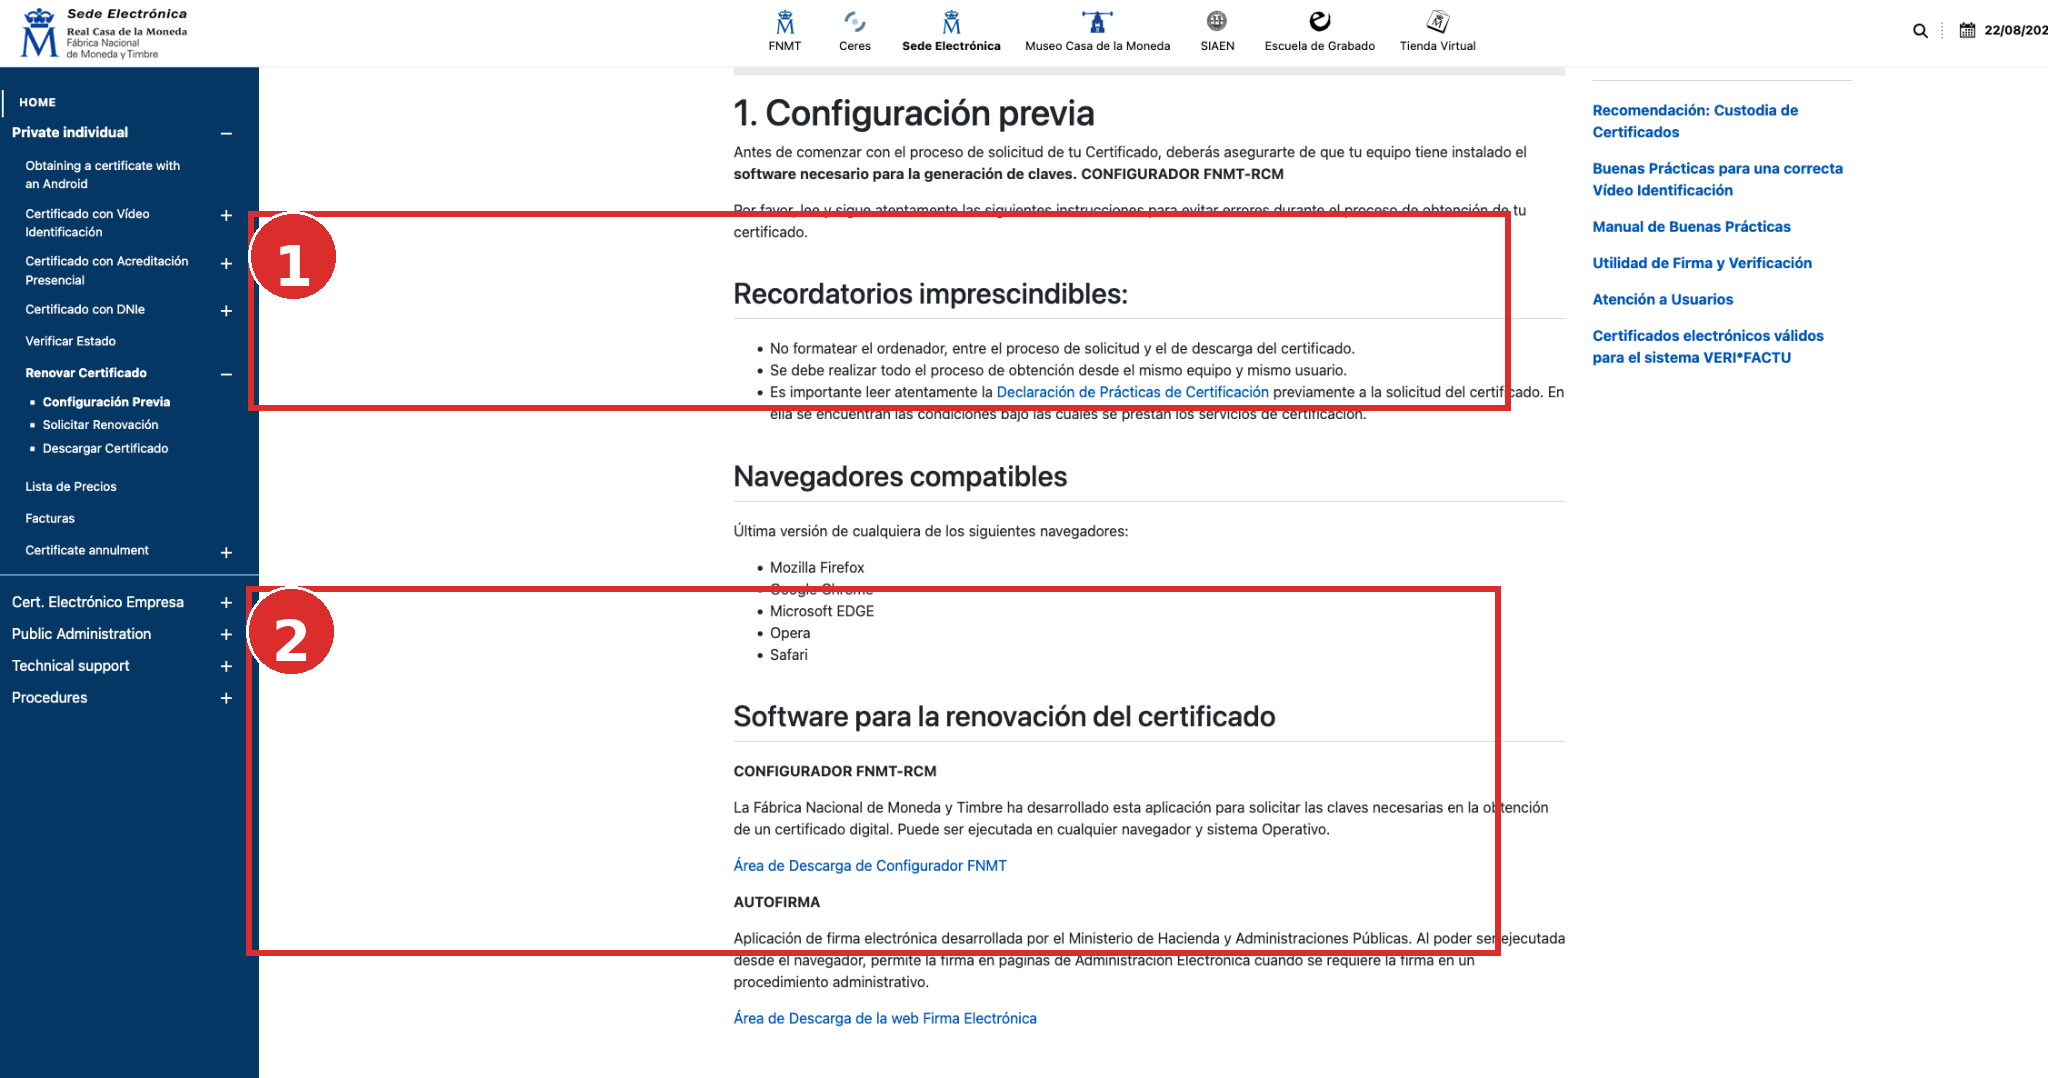
I downloaded Configurador FNMT-RCM from the official Configuración previa page. FNMT lists current Firefox, Chrome, Edge, Opera and Safari releases as compatible and explicitly requires the same computer and user account throughout the process.
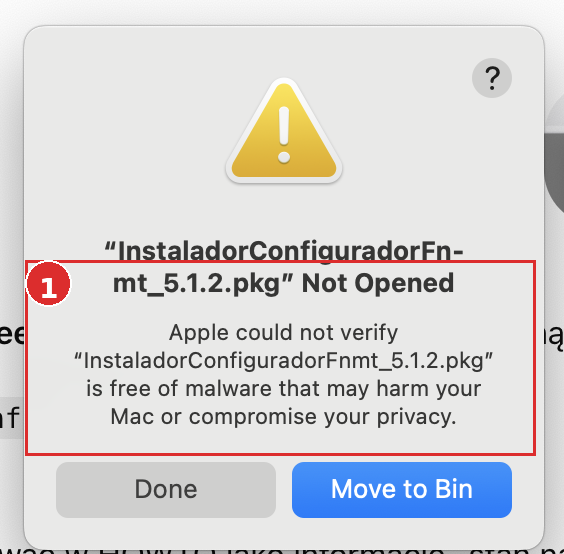
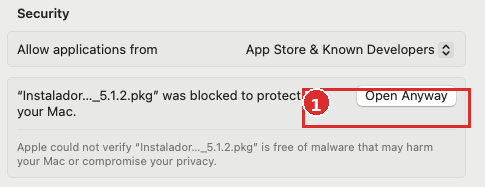
macOS Gatekeeper initially blocked the Configurador installer. This is not a warning to bypass for arbitrary software. Because the installer had been downloaded directly from FNMT, I went to System Settings → Privacy & Security and used Open Anyway.
The renewal request was also signed with AutoFirma. Download it only through an official FNMT/Spanish administration link rather than a third-party software site.
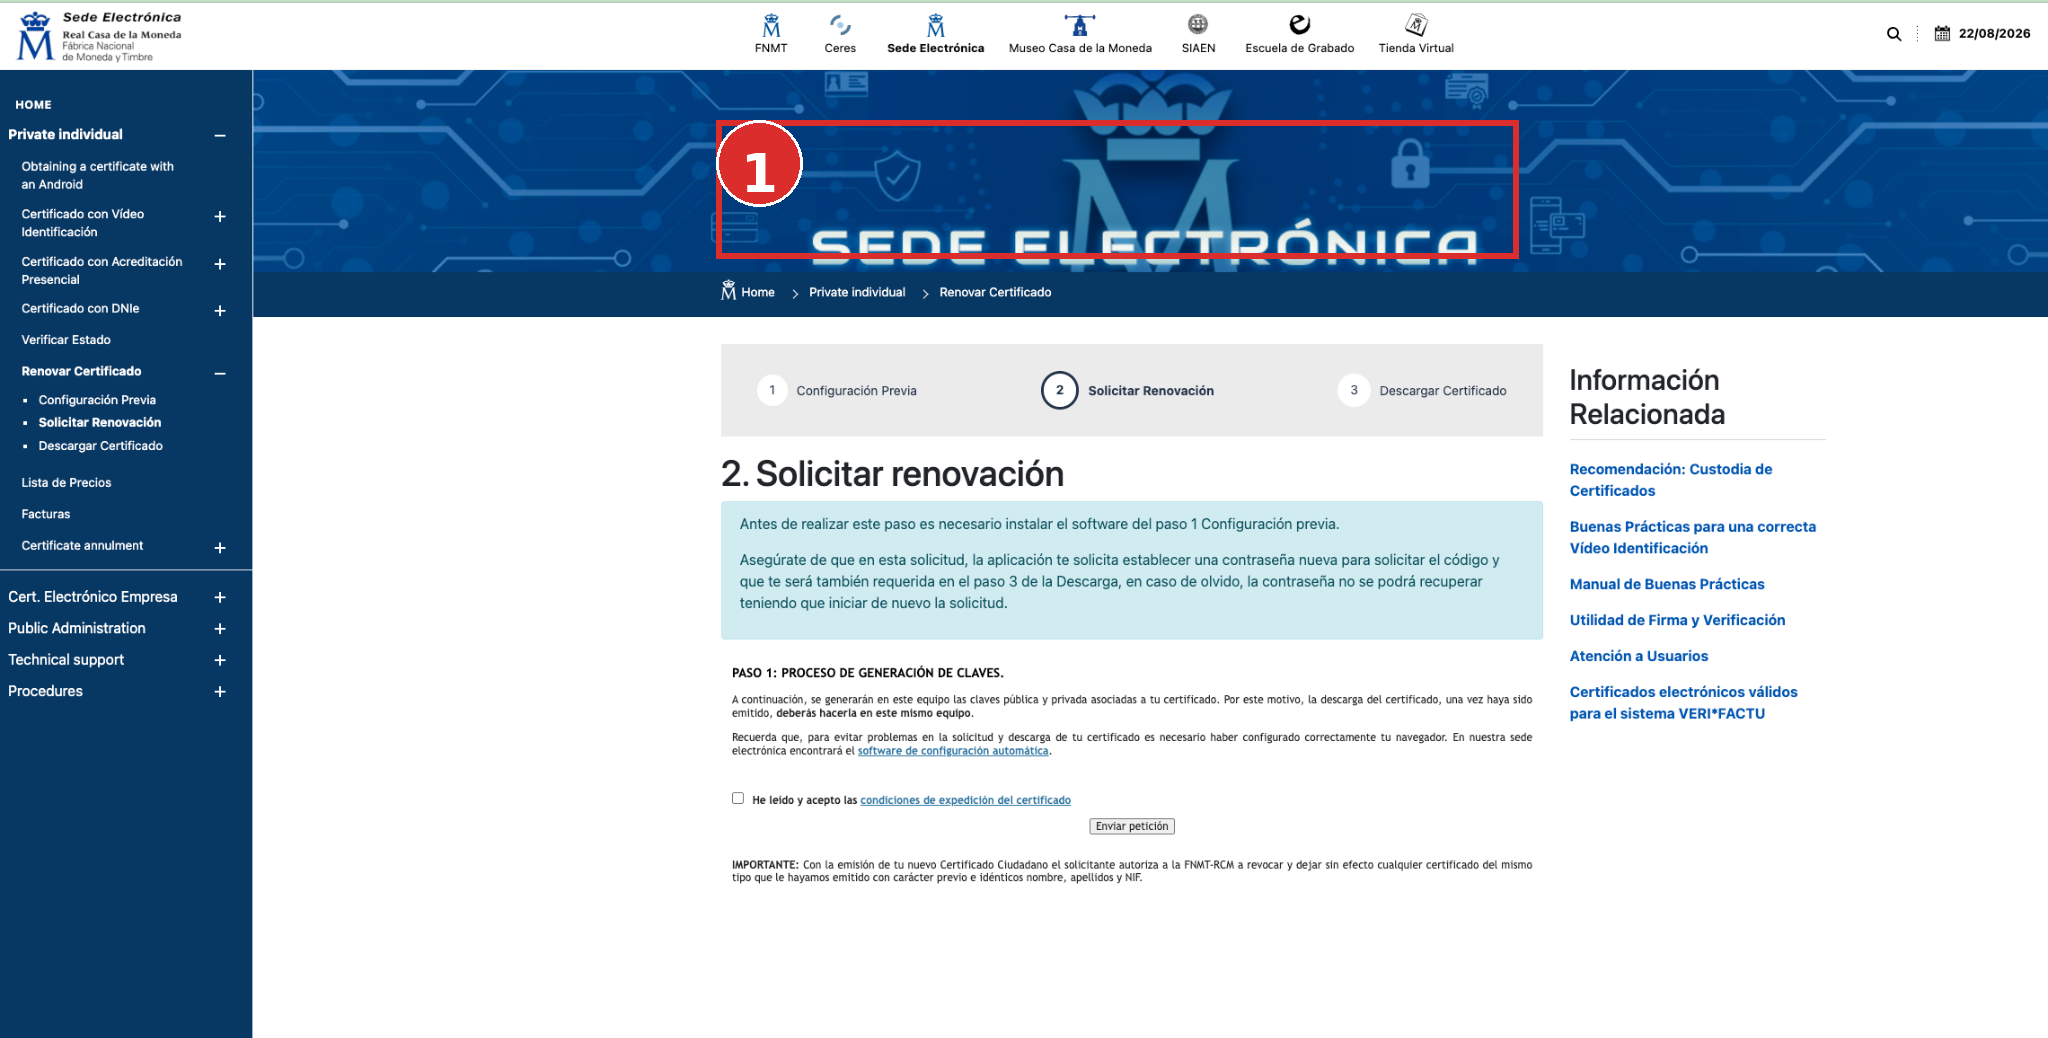
Step 3: start the renewal and authenticate with the old certificate
The process starts from Renovar Certificado. The current FNMT certificate must be available to the browser because it is used for authentication and for signing the renewal request.
Firefox entered a timeout/loop during part of the authentication in this session. Firefox is officially supported, so this is not evidence of a general incompatibility. In this particular run I completed the process in Chrome on the same Mac and the same user account.
Step 4: actually open the issuance terms
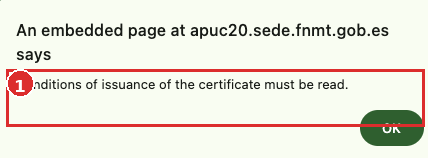
One non-obvious trap: ticking the acceptance box was not enough. FNMT displayed Conditions of issuance of the certificate must be read.. I had to open the terms page, return to the request, accept it and then submit.
Step 5: set the password for the new keys and do not lose it
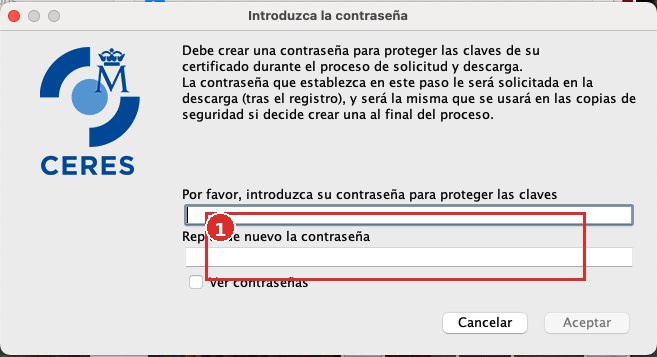
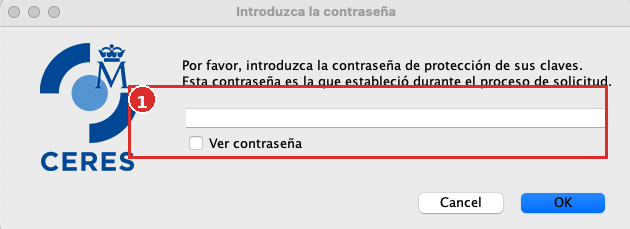
Configurador FNMT asked for a new password protecting the keys created during renewal. This is not your macOS password and not the password of the old certificate. FNMT warns that this password cannot be recovered; it is required again when the renewed certificate is downloaded and installed.
Step 6: complete the contact details
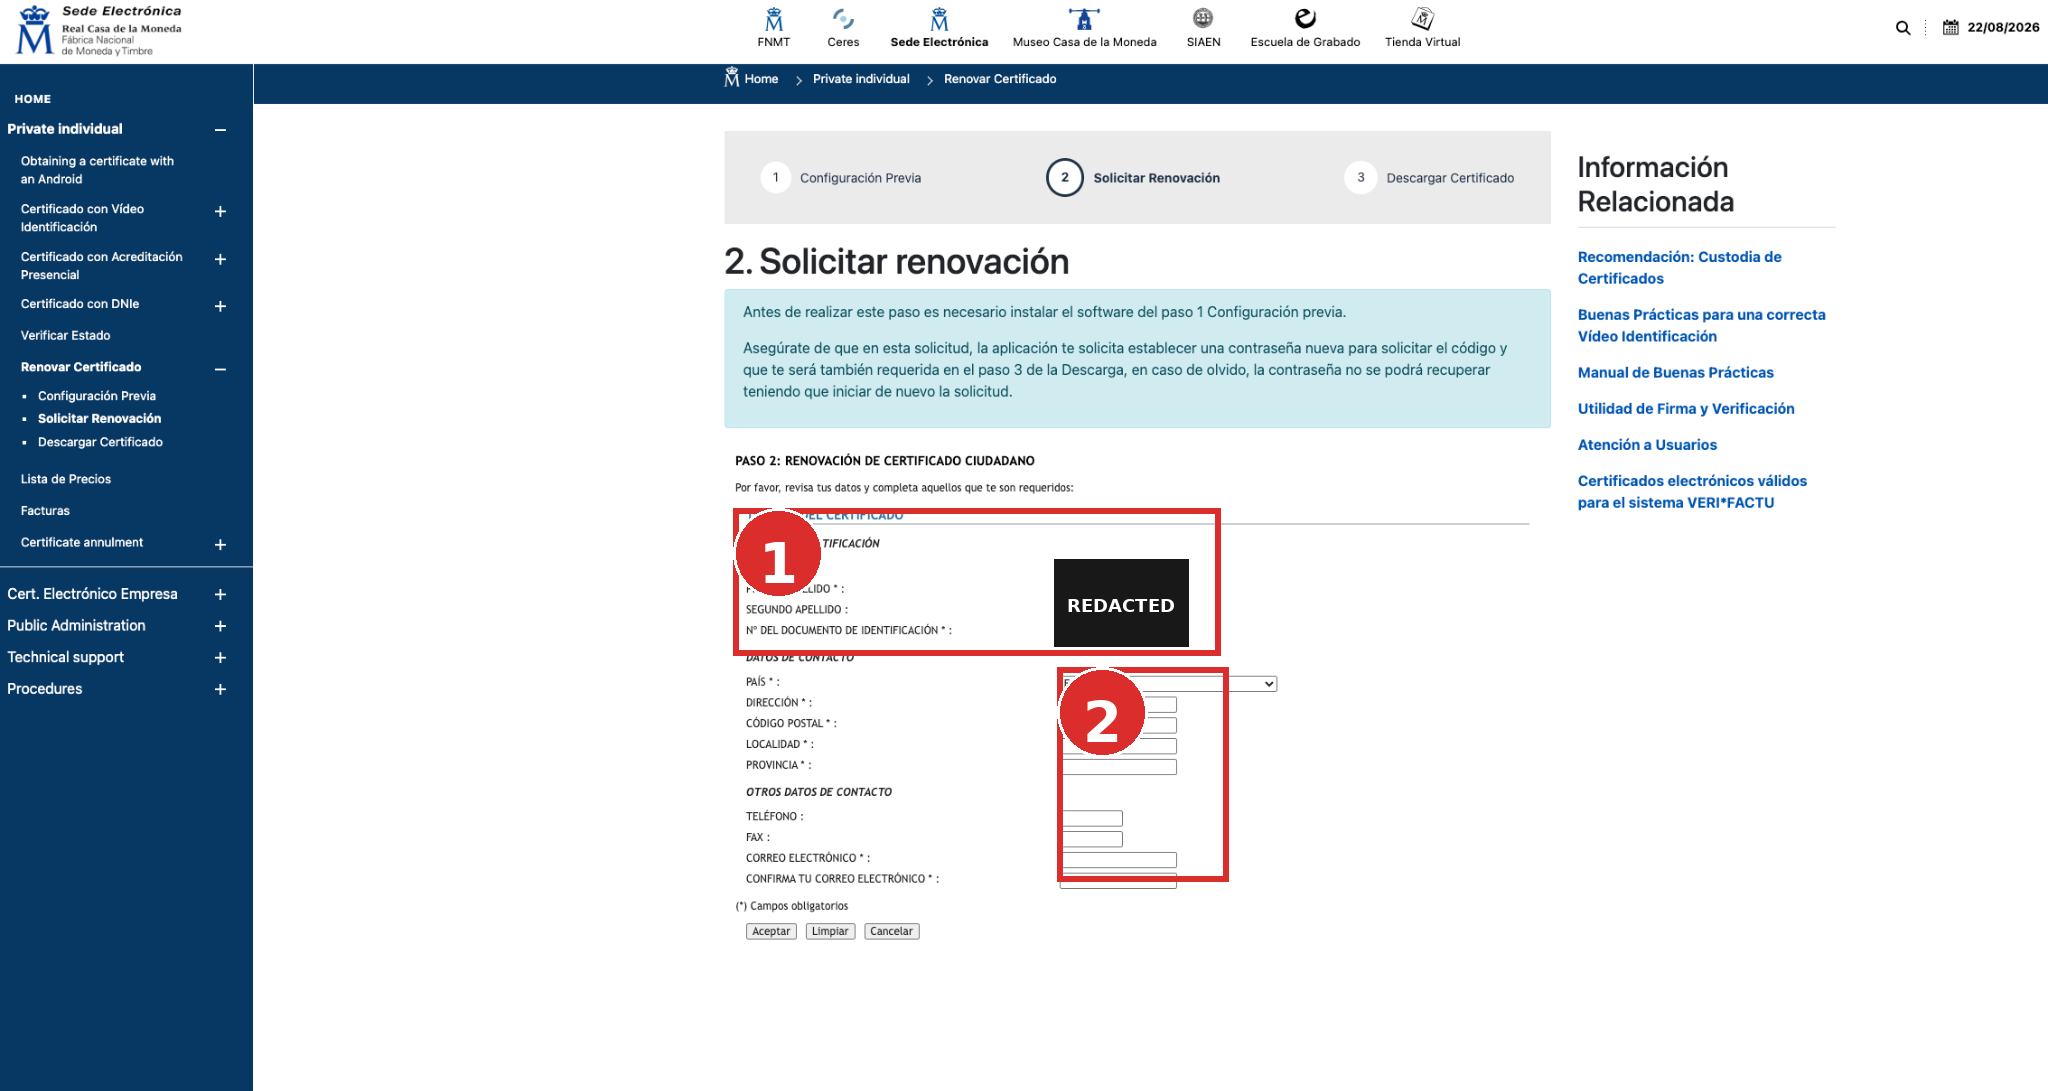
The next page asks for contact details. All identifying values in the screenshot below have been permanently removed. In this case the contact address was outside Spain; using the full region name Bayern was more appropriate than the abbreviation BY.
Step 7: sign the request with AutoFirma
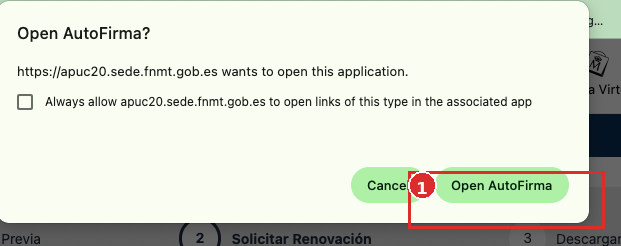
After the details were confirmed, the browser asked to open AutoFirma. I selected the existing FNMT certificate to sign the renewal request. macOS may additionally ask for permission to use the key stored in Keychain.
After the signature was accepted, FNMT confirmed that the renewal request had been processed successfully.
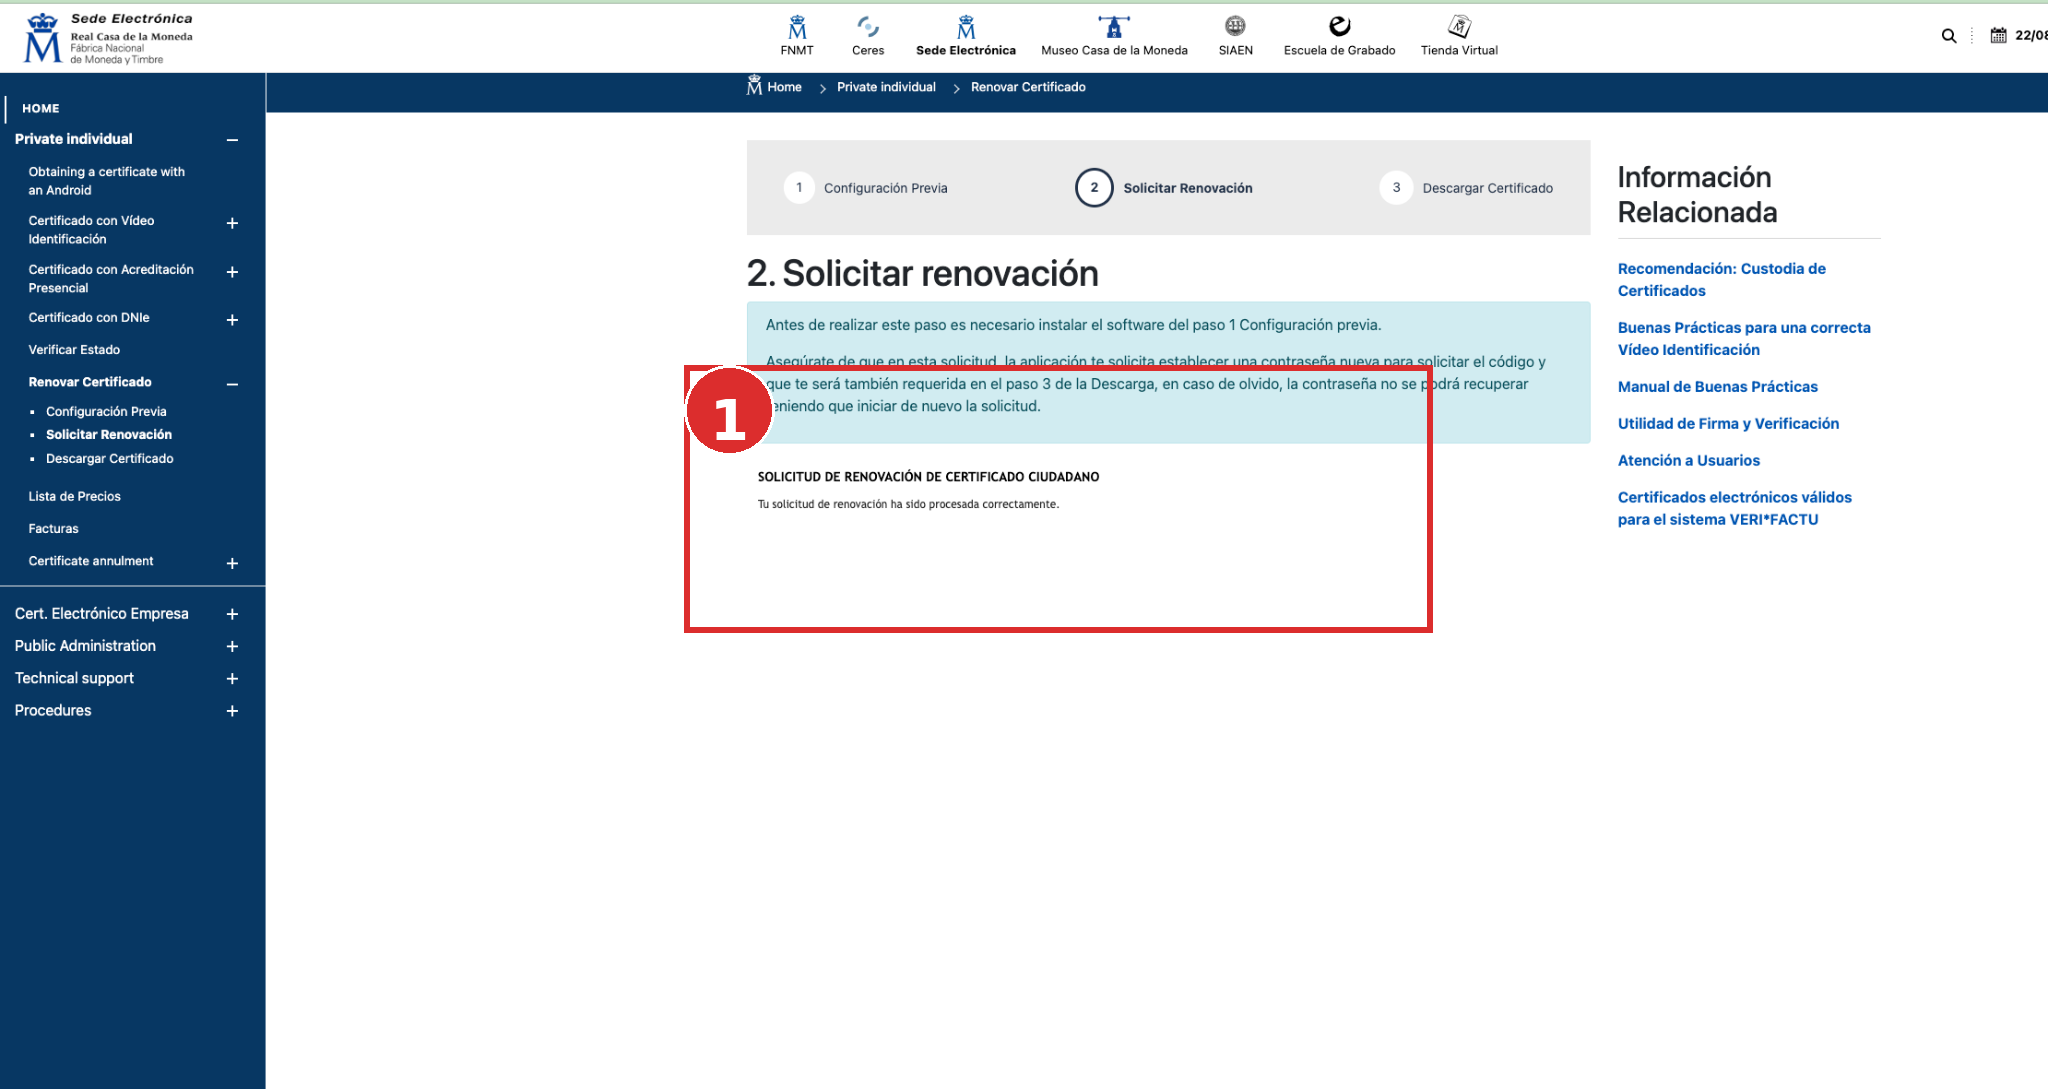
FNMT states that the certificate is normally available for download roughly one hour later. The request code arrives by email. No safe screenshot of that email was captured during the session, so this article does not invent one.
Step 8: download the certificate on the same computer
I returned to the download stage on the same Mac and user account. Before installation, FNMT displayed a process reference. It has been completely removed from the published screenshot.
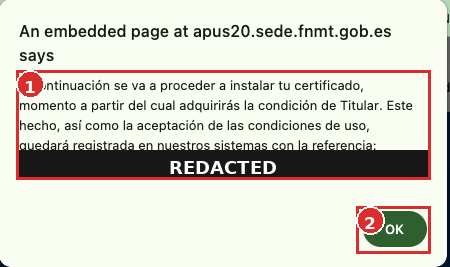
Configurador then asked for the same password that had been set when the new keys were generated.
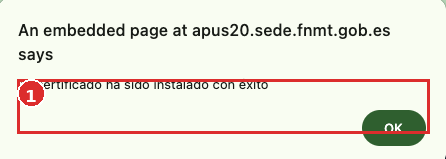
After a successful installation FNMT displayed Tu certificado ha sido instalado con éxito.
Step 9: immediately back up the new certificate
Configurador offered to save a new .p12 backup during installation. I verified this file too with OpenSSL and -legacy. Keep the backup in encrypted storage and store its password separately.
openssl pkcs12 -legacy -in new-fnmt.p12 -info -noout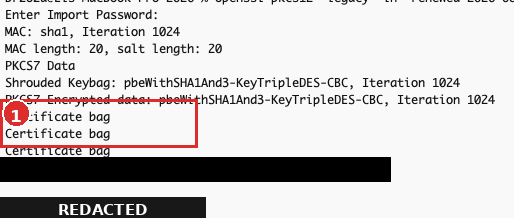
Why does the new certificate expire on 31 December 2028?
This is not a renewal error. In the documented case the new certificate was still issued under the RSA hierarchy. FNMT’s current citizen-certificate policy limits RSA certificates to no later than 31 December 2028. FNMT is simultaneously migrating to ECC, where G2/ECC citizen certificates may be valid for up to four years.
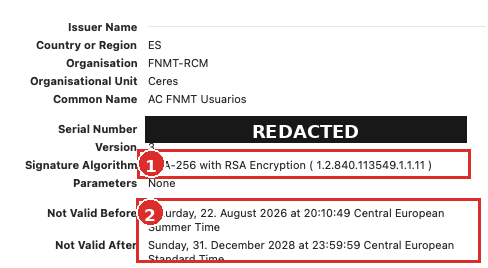
This also means you should not assume that someone obtaining a certificate in 2028 will receive one that expires at the end of 2028. FNMT plans to stop RSA issuance by the end of 2026 and transition to ECC, so later certificates may already use the new hierarchy and its four-year maximum.
Why are there two identical new entries in Keychain?
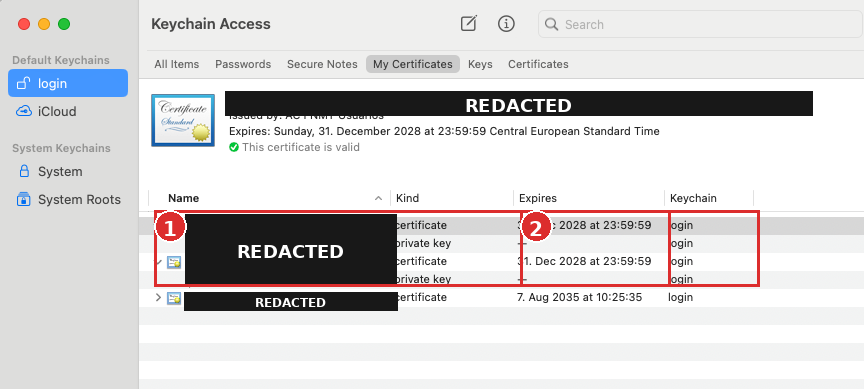
After installation, the login keychain contained two entries with the same validity dates and the same serial number. They were not two separate certificates; the same certificate had been imported twice. Before deleting anything, compare the serial, dates and presence of the private key. Nothing is removed in this guide because deletion was not required for the certificate to work.
Does the old certificate remain valid after renewal?
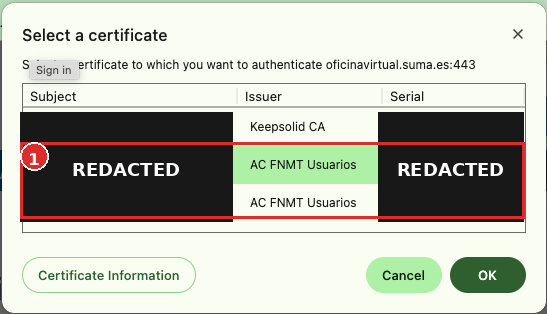
For a proper renewal inside the 60-day window there is an explicit exception. FNMT’s current policy states that the old certificate may remain valid until its original expiry date. That explains why the SUMA certificate selector showed both the old and the new FNMT certificate at the same time. A certificate being visible locally in Keychain is not, by itself, proof of validity in every scenario; the authoritative state is FNMT’s certificate status.
Final verification
After installation I performed two real login tests: SUMA Gestión Tributaria and the Agencia Tributaria (AEAT). The new certificate worked in both. This is a more meaningful validation than simply seeing a new row in Keychain Access.
Troubleshooting from this session
- Firefox timeout: Firefox is officially supported, but Chrome worked in this specific session when used on the same Mac and user account.
- Conditions of issuance must be read: genuinely open the terms; the checkbox alone may not be enough.
- Gatekeeper blocks the installer: use Privacy & Security → Open Anyway only after verifying the official FNMT source.
- OpenSSL 3 reports RC2-40-CBC unsupported: use
-legacy, as documented by OpenSSL. - Two new certificate entries: compare serial numbers and dates; identical values usually indicate a duplicate import.
- Forgotten renewal password: FNMT cannot recover it; the request has to be started again.
What happens after the one allowed renewal?
FNMT allows only one online renewal. When the renewed certificate later approaches expiry, you need to apply for a new certificate and verify your identity again using whatever method is available at that time.
There is an important limitation for NIE holders today: FNMT’s current video-identification page says that the service is presently available only for a valid DNI. A foreign citizen with an NIE should therefore check the current options and, if this has not changed, plan for in-person identity verification at an Oficina de Acreditación. FNMT publishes the required documents separately for EU citizens and other foreign nationals.
Security notes
- do not send
.p12files through email or chat without additional protection; - keep the backup and its password in separate places;
- never publish screenshots containing a name, NIE/DNI/NIF, address, email, certificate serial number or Código de Solicitud;
- do not delete the old certificate just because a new one appears; verify the backup and the new certificate first;
- if the private key may have been compromised, use the FNMT revocation process.
Summary
Renewing an FNMT certificate on macOS can be completed fully online when the renewal conditions are met. The key practical points are a verified backup of the old certificate including its private key, the same computer and user account, Configurador + AutoFirma, preserving the renewal password, backing up the new .p12 and performing a real login test after installation. In 2026 there is one additional wrinkle: FNMT’s RSA→ECC migration can limit newly issued RSA certificates to 31 December 2028.
Sources
- FNMT — Renovar Certificado
- FNMT — Configuración previa
- FNMT — Citizen Certificate Policies and Practices, v2.0
- FNMT — RSA→ECC migration information
- FNMT — Video Identification
- FNMT — Identity accreditation
- OpenSSL — pkcs12 documentation
Did this guide help?
If it saved you some time or frustration, you can buy me a coffee.